

Install Microsoft Teams Ticketing as a Service from TeamsWork Website

Updated: Oct 8
Hi All,
Ticketing as a Service helps your team manage service requests and incidents in Microsoft Teams. To learn more: Ticketing as a Service.
You can install Ticketing as a Service directly from the TeamsWork website. It takes about 3 minutes, and by the end you will have a working ticketing instance with your team added.
Open the Ticketing trial page
Go to the Ticketing trial page
Choose your region, then click "Add to Teams"
Ticketing As A Service is available in 3 regions. This choice sets where your data is stored. If you are unsure which to pick, Read our blog about regions in Ticketing As A Service.

Your browser might open a dialog window. Click "Open Microsoft Teams"

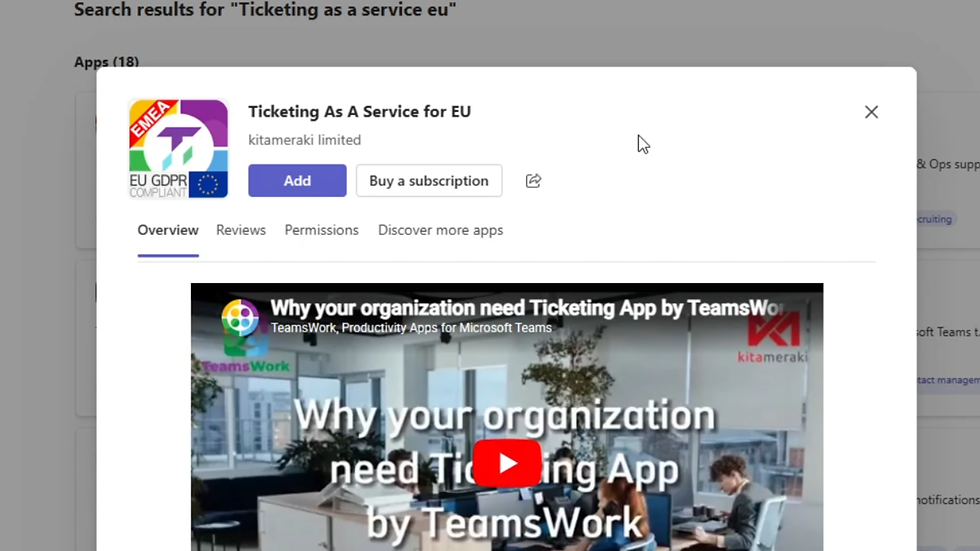
Click "Add"
If you encounter permission issue when installing the app, check how to get permission to install TeamsWork apps in Microsoft Teams.
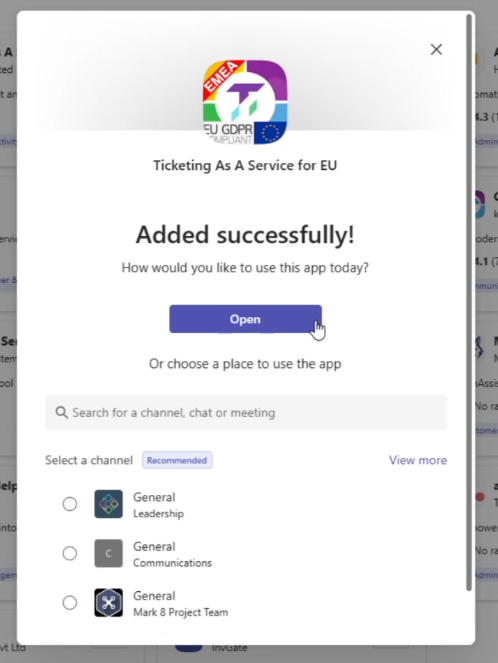
Click "Open"
This opens the Ticketing personal app in Microsoft Teams.
Sign in and start your free trial
Tick the box to agree to the Terms of Use and Privacy Policy, then sign in with your Microsoft account.
When you Sign in, you start a 30 day trial. During the trial you can use all advanced features. At the end of the trial, your organization can either continue with the free plan or subscribe to a paid plan.

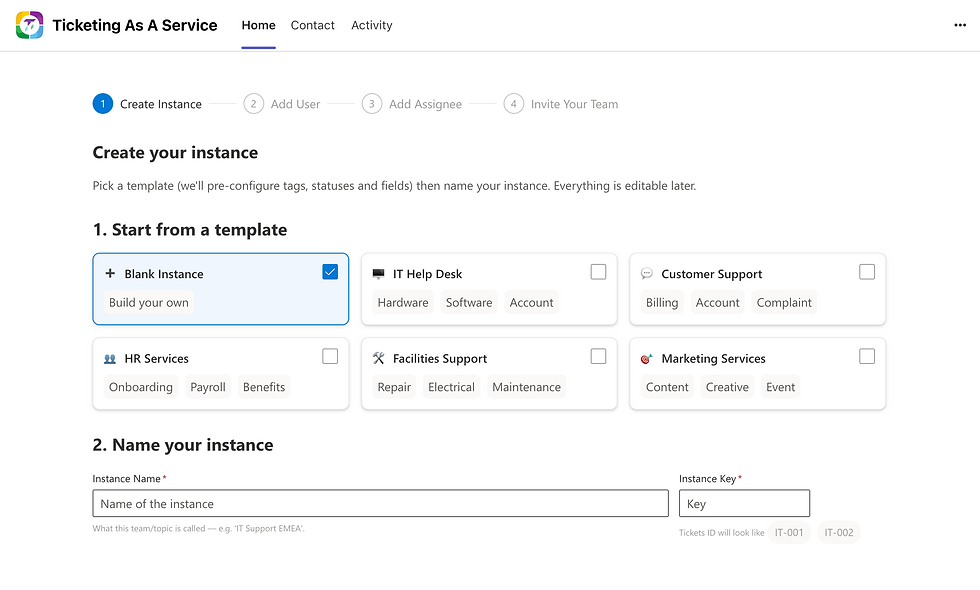
Add your first instance
Follow the wizard to create your first Ticketing instance.
An instance is a self-contained ticket space with its own members and configuration. You can add more later.
Installation Complete!
You've successfully installed Ticketing as a Service and created your first instance.

What to do next:
Create your first ticket — here's how.
Browse the documentation.
Need help?
Hope this helps, and have a nice day!
Marc


Comments